Saturday, August 20, 2011

Smash Box

Smash books are so cool. And in my small town they are also nearly impossible to find. So here's a spin on the book - a box.

Digital supplies- The Everyday kit by Valorie Wibbens

Physical supplies- Altoid tin, cardstock, scissors, corner punch, round punch, glue stick, bone file, and zig pen

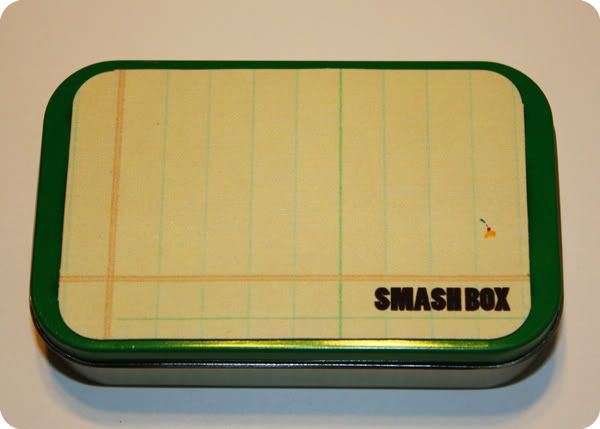
Want to make one with me? Here's what it will look like-


If you are using Val's The Everyday, it is already sized perfectly for a tin. (If you'll be using another kit, Val's The Everyday has a mask/template you may like to use to size your pages just right.)

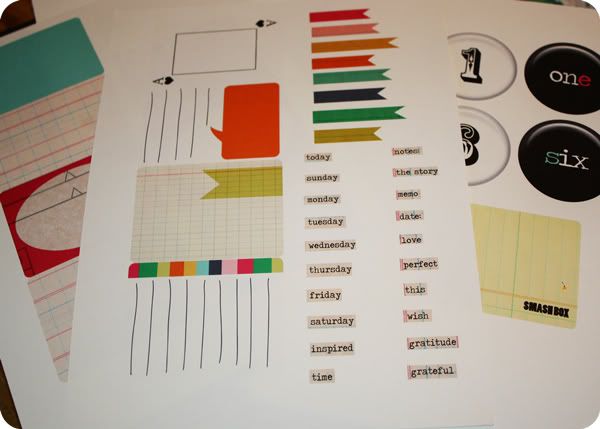
First, line up the files width to width and print. They should look something like this-


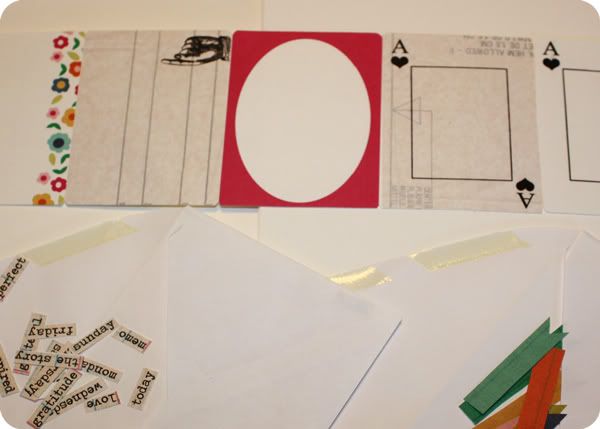
Next cut out your goodies. The strips you cut out, it's important to leave some excess on one end of the strip to use as an extention.


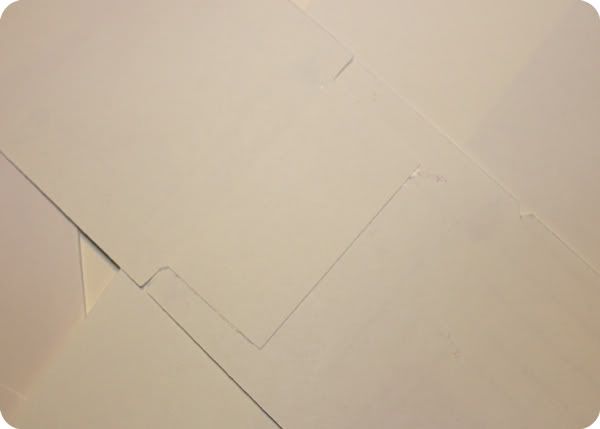
Trim that excess on the one end into a tab shape. With some glue you can adhere it to another strip now end to end like this-


You should have one long stip here in the end. You may notice, I use envelopes to keep my smaller items sorted and organized.

Now its time to accordian fold the strip. I use a bone file to make a good crease in cardstock. Next, use a corner rounder punch to all edges. The glue the end file into the base of the Altoid tin. It should look something like this-


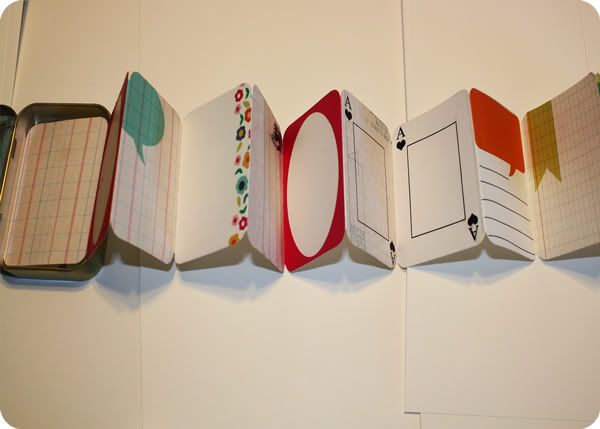
It should fold up and fit like this-


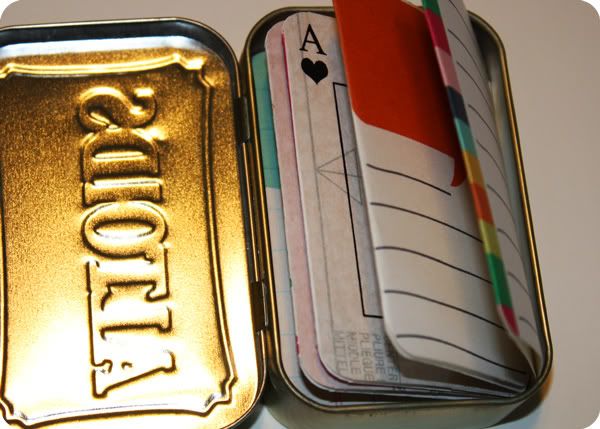
I used the round punch to cut out The Everyday Numbers. And in the end, this is what I have-


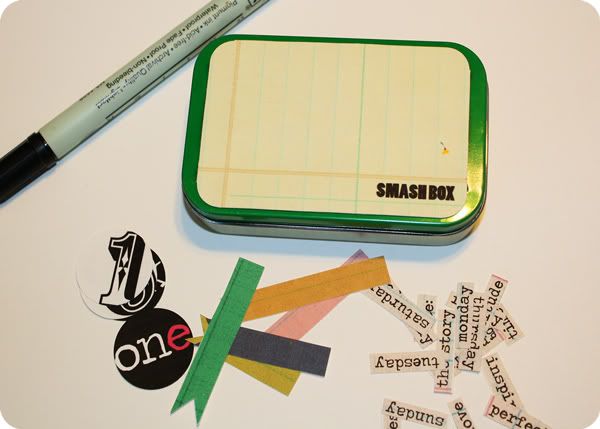
The cover was a individual file that I added a text layer to. I printed, used a corner punch, and glued it to the lid. All that is left now, is to decorate.

If you are unfamiliar with the idea of a Smash book, here's a link. It will hopefully give you some more inspiration- http://youtu.be/_PFsArr4Z1s

Tuesday, October 19, 2010

Expresso Mini Album

Chipboard is fun and easy to work with. It comes is all kinds of shapes and sizes. For this project I used an expresso shaped cutout. These are the supplies, other than scissors, that I used to create this project.


And here's the steps I took to create this album-

1. ink the edges of the chipboard
2. brush Mod Podge on the surface you wish to cover and apply printed paper
3. smooth out all the air pockets or wrinkles and set it aside to dry
4. trim the excess paper off with a pair of scissors or razor knife
5. use the handy nail file for removing the excess the scissors can't reach... a course file works best when working with chipboard
6. use a crop-a-dile to punch holes and add eyelets in the corner of the album
7. stack them up and add a jump ring to hold them together
8. ink edges of paper

At this point is looked like this-


And last- embellish your album!


These albums/mini books are fun to make and leave out on the coffee table and such. My kids and our guests love flipping through them. I hope this tutorial inspires you to give it a try.


Credits for this project-

Digital Supplies: Expresso Yourself collab kit by Valorie Wibbens and Leora Sanford and available at The Lily Pad
http://www.the-lilypad.com/store/pro...t=0&page=1

Physical Supplies: Chipboard, Paper, Ranger Distressing Ink, eyelets, Mod Podge, twine, ribbon, and jump ring

Sunday, May 23, 2010

Paper necklace

Here's what we'll be making-


Here's what you'll need- Below you will see a picture of the supplies I used. I printed off some papers I liked from Emily and Kathryn's Metamorphosis kit but you can do this with scraps too!


Next cut the papers into strips. I cut these the length of the paper which really adds bulk and strength to the "paper bead."


And I'm not a quiller so I utilized the end of a paint brush to wrap the paper around. Wrap it fairly tight and a touch of glue at the end will hold it in place.


This next step would be optional. I coated the "paper beads" with a glass finish to help protect them and give them a little shine.


If you do this step, make sure to let them dry completely before handling so you do not smudge the finish.


And to finish, string them on the leather cord and add your ends.


I hope you enjoy this project. It is one that is great to do with the kiddos too!

Paper lantern

As posted and can be found in the 2009 issue of The Daily Scrapper.

For this project, you will need:

paper (here I printed off some red digital paper by Amanda Heimann),
transparency film,
a paper cutter,
adhesive,
brads,
a razor knife and wire.
A paper piercer or small hole punch will help out for the brads- you really only need one or the other for this project.


Let’s get started.

First, let’s mark off an inch or two at both the top and bottom of the paper. It doesn’t need to be exact. This will become our guide for the cuts we will make in the next step. Make sure your markings are on the backside of your paper.


Next, slice your paper from the top guideline to the bottom guideline in even strips. You can make them thin or thick strips for the desired look. I used my paper cutter to slice and a razor knife to make sure the cuts were uniform after. When this step’s done you should have a flat piece of paper slit from one side to another.


This is the easiest step. Use adhesive to glue the top and bottom bands together full circle. This will leave you with a tall cylinder shaped skeleton of our lantern.


Here’s where the transparency comes in. Cut two piece of transparency a few inches shorter than the paper you are using. So if I used 11 inch paper I should cut my two strips at about 9 inches. Then punch holes in both ends. You will do the same with the lantern.


Now, use the brads to attach to transparency inside the lantern both top and bottom. This will give the lantern the round look and help it to hold that shape. Adjust the length of the strips to achieve the desired look of your lantern.


Last, twist some wire around the backside of the brads (inside the lantern) and it will be ready to hang. These are really fun and festive.

I hope you give this project a try.

Altered frame

I love to Reduce, Recycle, Reuse.

I love to incorporate that into my daily life and that includes scrapping when possible.

Today I wanted to do a tutorial on how to redecorate a picture frame. In this tutorial I am working with a ceramic tile frame that did not match my décor. The techniques shown here can be used on most kinds of frames. The supplies you will need are: a sheet of digital paper you wish to use, razor knife and cutting mat, and a good type of multi- purpose glue. Also- have handy a few things to decorate your frame with once it’s recovered.


Now, let’s get started. First we will need to remove the glass from the center of the frame. Just set that aside until the project is complete. Next, lay your printed paper face down on your cutting mat. With a pen or pencil, trace the opening for the photo on your printed paper. This will outline our workspace in the next step.


Here’s where we use the razor knife. Working within the box you’ve drawn, cut on “X” as shown in the center. *Note: the overhang of the outside edges should be slightly longer than the depth of your frame. You should have enough to cover the depth and wrap around to the backside of your frame.


The technique should work with any square or rectangular shaped frame.


Now we will apply glue to the face of your frame and then lay it centered on your printed paper. It is important to take a few minutes to smooth out the air bubbles that may form. The most difficult steps are behind us.


Let’s glue the flaps down (inner and outer) to the backside of the frame and trim.


And here’s a front view of the project.


As we finish up you will notice that your frame’s really taking shape. Now it’s time to decorate. For the example shown, I wanted a shabby chic look. I chose to accent with a gold leafing pen and attach an antique drawer pull with a couple of glue dots. Those were things I had left over from another project.


And here’s how the project turned out.


I hope this inspires you to reuse an old frame or customize a new one. It’s fun, easy, and great to personalize. Add a name or sentiment and it would make a perfect gift too.

Flip book

Want to give this a try? It's really easy to do. Here's what you'll need-

12x12 cardstock, a paper trimmer, ribbon, adhesive, scissors and a razor knife.


A couple of tips- If you click on an image here it will come up larger in its own window for easy reading or printing. Another thing I find handy when assembling this is to have a bone file ready or you can use the side of a zig pen to run over the creases/folds of your papers. And last, if you use heavily textured papers, use a good glue rather than tape for adhesive. Its my experience that tape and glue-dots aren't quite strong enough for those types of papers.

Paper bag book

Let’s talk paper bags…


These are so much fun to do and perfect for fall albums.

So here’s what you need-


Alternate them as you lay them out in the opposite directions like this-


Once they are laid out, you will need to make sure you have some ribbon handy. Take your stack of bags and fold the entire stack in half together, like this-


Give the seem a good hard crease. (A bone file or the side of a zig writer work good to enforce it.) Tie the ribbon around at the crease to hold your album together. There you go! The hardest part is done!

From here we decorate our albums to taste. That is one of the reasons I love doing these types of albums- the possibilities are endless. For this album, I wanted to add pull-outs. I measured the dimensions of the space in my bag and cut some basic cardstock. Then I cut some smaller circles out of the digital paper I printed. Add a little glue and fold the circle over the edge like this to reinforce (and decorate) the paper that will be slid in and out.


At a side view of your album you can see that two of these will fit into each open end of a bag. Decorate them, add pics or journalling, whatever your heart desires. Be creative! For this album I used Funky Fall collab kit by Amanda Heimann and Kelley Mickus.


And don’t forget to do something fun and fab to the cover of your album. Here I used the digital papers I printed off to layer. I stamped fall on with acrylic paint and inked around the edges with a coordinating color.


I hope you have fun with this! I would love to see your project so drop me a link if you'd like! :)